Claiming your profile proves you work at the company. Verifying your domain goes a step further: it proves your business controls the website tied to the listing. It is the strongest ownership signal on TrustRating, it takes a few minutes of actual work, and you only ever need one successful verification per domain.
This guide explains why domain verification matters, walks through both supported methods — a DNS TXT record or a confirmation email sent to your domain — and covers the waiting, the troubleshooting, and what happens when your domain changes later.
Why domain verification matters
- The verified badge. A green verified marker appears on your public company page, telling every visitor that the business behind this website genuinely controls this profile. For a shopper deciding between two similar companies, that badge does real work.
- Better search visibility. Verified domains are included in our public sitemap and exposed through the API, which helps your profile get indexed and surfaced by search engines.
- Domain-aware features line up. Verification confirms the website tied to your listing, so review invitations, embedded widgets, and integrations all reference the right domain.
- Protection against impersonation. Once your domain is verified, a bad actor cannot quietly present your website as theirs on the platform. Disputes over who owns a profile are settled decisively by who controls the domain.
If you have not claimed your profile yet, start with claiming your company profile — domain verification lives inside the business panel. In fact, when a claim is approved we automatically start a DNS verification for you and email you the record to add, so you may already have instructions waiting in your inbox.
The two methods at a glance
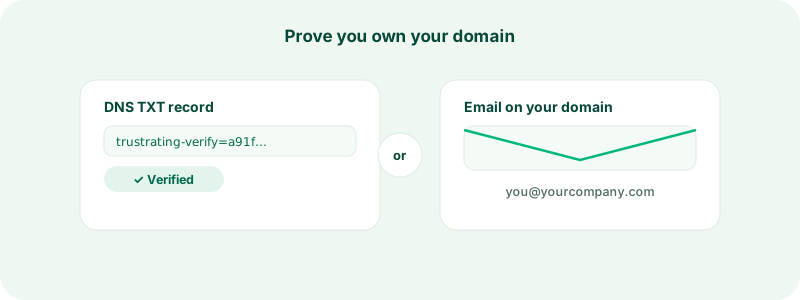
Open Domain in your business panel and you will see two tabs. You only need one method to succeed:
- DNS record. We generate a unique TXT record; you add it to your domain's DNS; we detect it automatically. Best when you (or your IT team) can edit DNS. Works even if nobody can read email at the domain.
- Email. We send a one-click confirmation link to a mailbox at your domain — admin@yourcompany.com, for example. Whoever can read mail at the domain controls it, so a single click verifies ownership instantly. Fastest when you have inbox access.
Choose whichever is easier. If one stalls, cancel it and try the other — requests are independent.
Method 1: the DNS TXT record
- In the Domain section, keep the DNS record tab selected, confirm your domain (enter it without https:// or paths — just yourcompany.com), and click Generate TXT record.
- We show you a unique value beginning with trustrating-verify=. Copy it exactly with the copy button.
- Sign in to wherever your DNS is managed — usually your domain registrar or DNS host.
- Add a new TXT record at the apex of the domain. The apex (also called root) is usually written as @ in the host or name field. Paste the full trustrating-verify value into the value or content field.
- Save, come back to TrustRating, and click Re-check. If the record has propagated, the row flips to VERIFIED on the spot.
The generated record stays valid for 14 days, and we keep re-checking automatically in the background during that window — you do not have to sit there clicking.
Registrar specifics vary in wording, not in substance:
- Cloudflare: open your site, go to the DNS tab, click Add record, choose type TXT, set the name to @, paste the value into Content, and save. Cloudflare updates are typically visible within minutes.
- GoDaddy: from your domain portfolio, open DNS for the domain, click Add new record, choose TXT, set Name to @, paste the value, and save.
- Namecheap: open Domain List, click Manage next to the domain, switch to the Advanced DNS tab, add a new record of type TXT Record with host @, paste the value, and save.
Other providers — Google Domains successors, Route 53, OVH, IONOS, and the rest — follow the same pattern: record type TXT, host or name @, value the full trustrating-verify string. Any TTL is fine; a low one just propagates faster.
Tip: paste the value exactly as shown, with no surrounding quotes and no trailing spaces. Some DNS dashboards add quotes automatically — that is fine, but do not add your own on top.
Method 2: an email at your domain
- Switch to the Email tab, confirm the domain, and choose the mailbox name — the part before the @. We suggest common ones like admin, but any mailbox you can read works. The domain half is fixed to the domain being verified; it can never be pointed somewhere else.
- Click Send confirmation email. A message arrives at that address with a single confirmation link.
- Open the email from that inbox and click the link. Verification completes instantly — no DNS, no waiting.
The link is valid for seven days and works once. If it expires before anyone clicks it, just send a new request.
Waiting on DNS propagation
DNS changes are not instant. Most records become visible worldwide within minutes, but some providers and network caches take hours, and in rare cases up to a day or two. TrustRating handles this gracefully: a check that does not find your record yet does not fail the request. The row simply stays pending, shows what the last check found, and gets re-checked automatically until the 14-day window closes. Add the record, get on with your day, and let the checker do its job.
Troubleshooting a failed verification
"TXT record not found" keeps appearing. Three usual suspects: the record has not propagated yet (wait an hour and re-check); the record was added at the wrong host — it must be at the apex (@), not at www or another subdomain; or the value was altered in transit — re-copy it and compare character by character.
The request expired. Fourteen days passed without a successful check. Use the token-rotation option on the row to get a fresh value and a fresh 14-day window, or start a new request. Rotation also exists for a second reason: if your token was pasted somewhere public — a shared ticket, a group chat — rotate it to invalidate the exposed value.
The confirmation email never arrived. Confirm the mailbox actually exists and can receive external mail — a common surprise with catch-all setups and distribution lists. Check spam and corporate quarantine. If the address was wrong, cancel the request and send a new one to a mailbox you can read.
The email link says it is invalid. Links expire after seven days and die once used. Some mail security tools "preview" links and consume them; request a fresh one and open it directly in your browser.
A stale request is cluttering the list. Requests for misspelled domains or abandoned attempts can be cancelled — they stay visible as expired for the audit trail but are no longer active.
If none of that unblocks you, contact support with the domain name and we will look at the checks from our side.
Changing domains later
Companies rebrand, and domains move. The system is built for it:
- You can verify additional domains at any time — the verification list holds as many as you need.
- The verified badge is tied to the domain currently on your company profile. If you switch your website, update the domain in your profile settings, then verify the new domain the same way.
- Removing the last verified proof for your current domain removes the badge from your public page until a new verification succeeds, so plan a rebrand in the right order: verify the new domain first, then flip the profile.
Frequently asked questions
Do I need to keep the TXT record forever? The record must be present when a check succeeds. We recommend leaving it in place — it is inert, invisible to visitors, and lets ownership be re-confirmed without friction.
Does verification affect my TrustScore? No. The TrustScore is computed from reviews only. Verification changes trust signals around the score, never the number itself.
Can a teammate run the verification? Starting and cancelling verification requests is reserved for the company owner; teammates with manager access can run re-checks. See inviting teammates and managing roles for how the roles divide up.
With your domain verified, the badge is live and the foundations are done. A good next step is branding your public profile so the page the badge sits on looks like your company, not a placeholder.